
The adipose tissue harvest is a 30-minute outpatient procedure performed under local anesthesia: approximately 20 cc of subcutaneous fat collected via a small-bore cannula, packaged under chain-of-custody protocols, and shipped to L2 Bio for processing. For physicians already comfortable with minor liposuction techniques, the procedure requires minimal additional learning. For those who are not, Save My Fat’s training program covers every step before the first patient is scheduled. This guide walks through the full procedure from the provider’s perspective, including patient selection, the harvest technique, specimen handling, documentation, and adverse event reporting obligations.
TLDR: The harvest is a 30-minute in-office procedure under local anesthesia. The provider collects approximately 20 cc of subcutaneous fat via a small-bore cannula from the abdomen or flank. The specimen is packaged under chain-of-custody protocol and shipped to L2 Bio. No hospital facility, no general anesthesia, no on-site lab. For physicians already performing liposuction or minor aesthetic procedures, the technique is familiar. Full training and protocol documentation are provided before the first patient.
Important Disclaimer: Save My Fat does not provide FDA-approved treatments or cures for any disease. The harvest procedure described in this post is a tissue collection procedure for banking purposes only. Banking adipose tissue does not guarantee eligibility, access, or clinical benefit from any future therapy, clinical trial, or medical program. All content is for educational purposes only and does not constitute medical advice or procedural training. Formal procedural training is provided through Save My Fat’s provider onboarding program, and this post does not substitute for that training in any respect.
A physician who has worked through the market context, the model, and the compliance framework eventually reaches the purely clinical question: what does the procedure actually involve, and is it something the physician can perform competently? This is the same technical due diligence any physician does before adding any new procedure to their practice, and it deserves a real answer rather than a marketing summary.
The harvest procedure has a straightforward clinical profile. It is a mini-lipoaspiration, smaller in volume than a full aesthetic liposuction case, same basic mechanics, lower complexity. Any physician comfortable with a cannula and local anesthesia can learn this procedure. The differentiating factor is not the technique. It is the chain-of-custody and specimen handling protocols that govern what happens to the tissue after collection. Those are covered entirely in Save My Fat’s provider training.
This post covers the full procedure from the provider’s perspective: patient selection criteria, pre-procedure preparation, the harvest technique, specimen packaging and chain-of-custody documentation, post-procedure patient care, and adverse event reporting obligations. It also addresses the two technical questions physicians consistently ask before committing to training: how different is this from liposuction I already perform, and what happens if a patient has a complication.
Patient Selection: Who Is a Good Harvest Candidate
General Eligibility
Most healthy adults with sufficient subcutaneous fat volume at an accessible donor site are candidates for the harvest. The minimum requirement is enough accessible subcutaneous fat to yield approximately 20 cc of tissue, which is a low threshold for most adult patients outside of very low body fat athletes or patients with significant subcutaneous fat loss. The landmark 2002 Zuk et al. paper established the biological basis for why adipose tissue is the preferred source for this kind of collection, and the Save My Fat overview of adipose-derived stem cells covers the clinical background in patient-appropriate depth.
Contraindications to Screen For
Standard contraindications should prompt deferral or specialist consultation. These include active infection at the donor site or systemic infection, active bleeding disorder or therapeutic anticoagulation (where timing should be discussed with the prescribing physician), known hypersensitivity to local anesthetics, active malignancy (where oncology consultation is warranted), pregnancy, and severe comorbidity that significantly increases procedural risk. None of these contraindications are unique to banking. They mirror the same criteria that apply to any minor liposuction procedure, as documented in the published safety literature on small-volume fat grafting and related techniques. Save My Fat’s resource on comparing banking services is a useful reference when patients want to understand how eligibility criteria differ across providers.
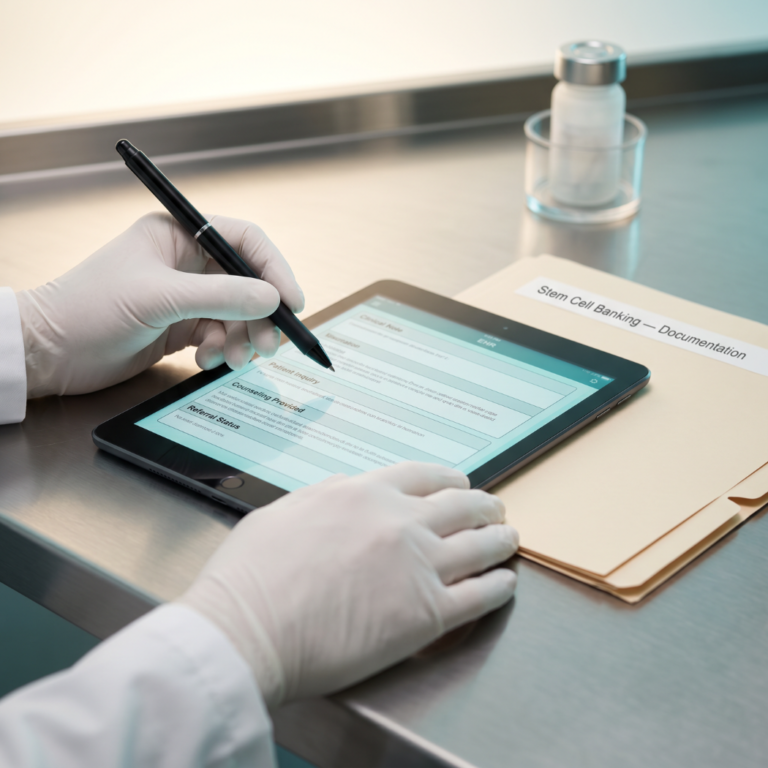
The Pre-Procedure Consultation
The consultation has two purposes: confirming clinical candidacy and completing informed consent. Informed consent for banking must cover what banking is, what the harvest procedure involves, what risks are associated with the procedure, what L2 Bio will do with the specimen, what the patient’s cells will and will not be used for, what the cost structure is, and what limitations apply to future access. The regulatory basis for this consent structure is found in 21 CFR Part 1271, and Save My Fat’s overview of informed consent in regenerative medicine walks through the consent framework partner providers use.
Pre-Procedure Preparation
Patient Preparation Instructions
Standard pre-procedure instructions align with any minor liposuction case. The patient should discontinue NSAIDs and non-essential blood thinners per clinical judgment prior to the procedure, with therapeutic anticoagulation managed in coordination with the prescribing physician. The patient should avoid alcohol for twenty-four to forty-eight hours prior. Comfortable, loose-fitting clothing is appropriate for the day of procedure. A light meal before the procedure is acceptable. The procedure is typically performed under local anesthesia only, so sedation is not routinely required, but the patient should arrange transportation if sedation is used in any individual case.
Provider Preparation
Before the patient arrives, the provider and staff should confirm that the chain-of-custody shipping kit is prepared and labeled per Save My Fat protocol, that the specimen transport containers and labeling materials are available, that L2 Bio shipping logistics for the procedure date are confirmed, and that informed consent documentation has been reviewed with the patient and signed. The FDA’s tissue products page is the primary federal reference for the documentation framework that governs tissue collection establishments, and Save My Fat’s overview of FDA regulations for adipose tissue translates that framework for practicing providers.
The Harvest Procedure Step by Step
Step 1: Donor Site Selection and Marking
The most common donor sites are the periumbilical abdomen and the flank. Both provide reliable access to subcutaneous fat with good cell yield. The inner thigh is an alternative for patients with limited abdominal access. Mark the collection area with the patient standing to account for fat distribution changes in the supine position. Donor site selection criteria are straightforward: accessible subcutaneous fat layer, no active skin pathology at the site, and patient comfort and accessibility in the supine or lateral position. The selected donor site should be photographed and documented per the practice’s standard procedure documentation.
Step 2: Local Anesthesia
Infiltrate the donor site with a tumescent or dilute lidocaine solution. Standard tumescent technique uses lidocaine at 0.05% to 0.1% with epinephrine at 1:1,000,000 in normal saline, infiltrated to tissue turgor. Allow approximately fifteen minutes for vasoconstriction before proceeding. Total lidocaine dose should remain within safe limits per patient weight, and the provider should calculate the maximum dose before infiltration begins rather than relying on visual assessment during the procedure.
Step 3: Entry Port and Cannula Placement
Create a small entry port, typically a two-to-three-millimeter stab incision, at the margin of the marked collection area. Insert a small-bore harvesting cannula, typically two to three millimeters in diameter and fifteen to twenty centimeters in length. A blunt-tip cannula is preferred to minimize mechanical trauma to the cells. Preserving cell viability in the collected specimen is the priority, not speed of collection, and cannula selection reflects that priority.
Step 4: Tissue Collection
Using a syringe or low-pressure mechanical aspiration, collect approximately 20 cc of subcutaneous fat. The target volume is 20 cc of fat tissue, not 20 cc of total aspirate including tumescent fluid. Tissue yield is assessed by appearance: fat tissue is yellow and buoyant, while blood-stained or fluid-heavy aspirate indicates the collection zone has been exceeded or the technique needs adjustment.
Avoid high-pressure or high-speed mechanical aspiration. Excessive mechanical force reduces cell viability in the collected tissue, and the 2006 ISCT minimal criteria together with the IFATS and ISCT joint consensus establish the viability and characterization standards the downstream lab will measure the specimen against. Manual syringe aspiration at low negative pressure is preferred, and this is the single technique difference most aesthetic liposuction providers need to internalize when adapting to banking collections.
Step 5: Entry Port Closure and Dressing
Close the entry port with a single absorbable suture or Steri-Strip. Apply a small pressure dressing. The patient can dress and ambulate immediately. No drain is required for a 20 cc collection volume, which is a meaningful operational difference from higher-volume aesthetic cases.
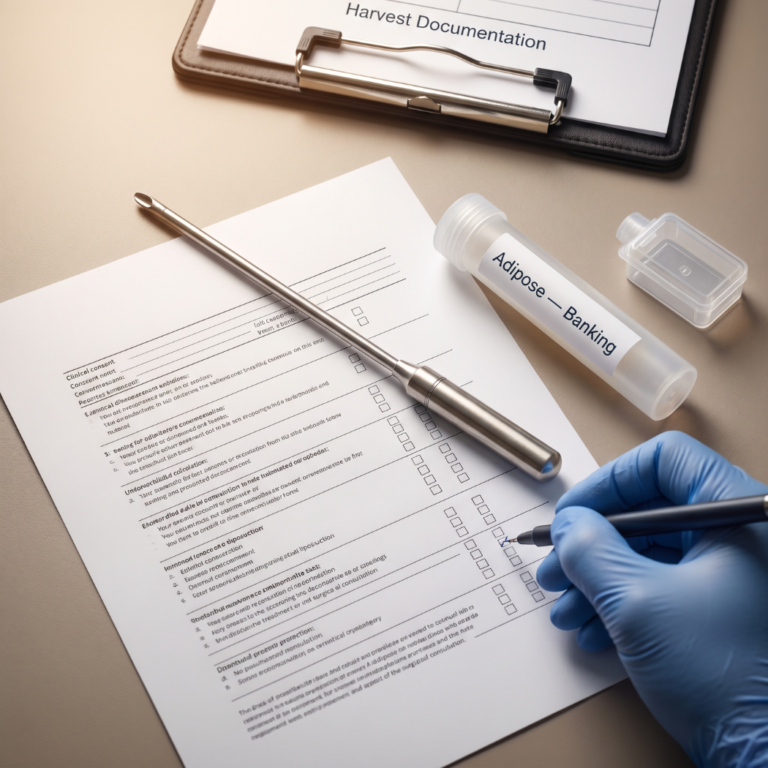
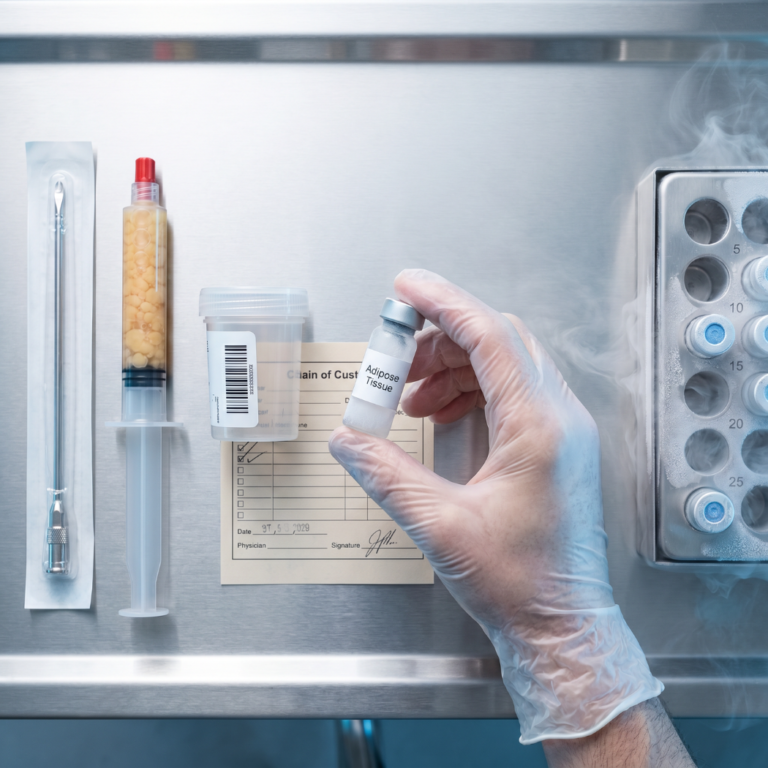
Step 6: Specimen Preparation and Packaging
Transfer the collected tissue into the specimen container provided in Save My Fat’s chain-of-custody kit. Do not add saline, media, or any other substance to the specimen unless specified by the protocol. Label the container per the chain-of-custody documentation requirements: patient identifier, collection date and time, provider name, and donor site. Complete all chain-of-custody documentation before the specimen leaves the procedure room. This documentation is the regulatory record that the tissue was collected, labeled, and transferred correctly, and it aligns with both 21 CFR Part 1271 obligations for tissue handling and the FDA physician guidance on expanded access framework that will govern any downstream use of the banked tissue.
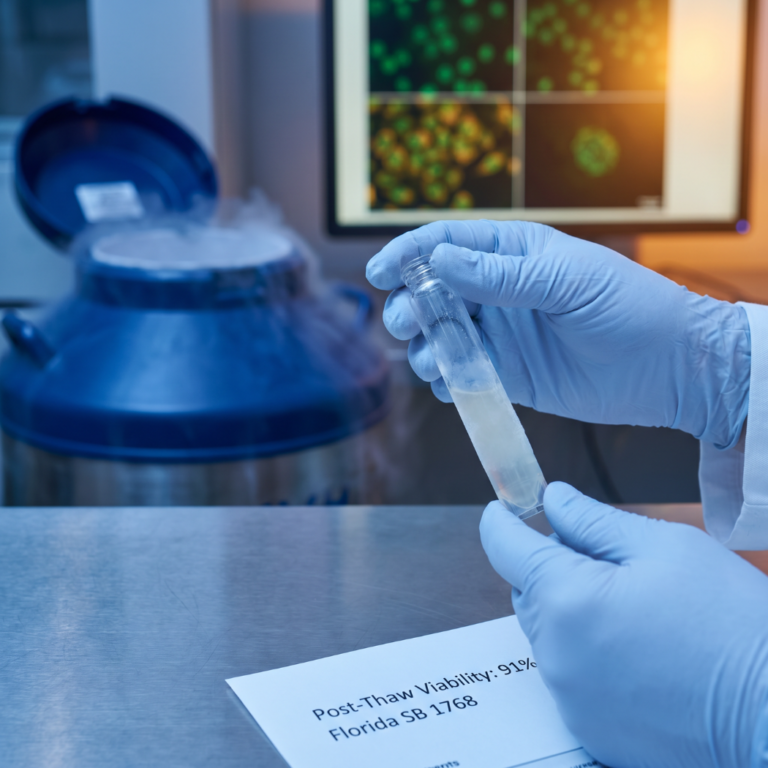
Step 7: Shipping to L2 Bio
Package the labeled specimen container per the shipping instructions in Save My Fat’s provider protocol. The kit includes the appropriate transport medium and temperature-controlled packaging. Ship via the designated carrier on the same day as collection. L2 Bio receives the specimen, confirms chain-of-custody documentation, and initiates processing within the protocol window. Save My Fat’s overviews of what happens after banking and the complete banking process cover the downstream lab workflow for any patient or partner physician who wants the full picture.
Post-Procedure Patient Care
The harvest site is a minor procedure site, and post-procedure instructions are straightforward. Patients should expect mild bruising and tenderness at the donor site for three to seven days, and should avoid vigorous physical activity at the donor site for five to seven days. NSAIDs are appropriate for discomfort unless otherwise contraindicated for the patient. Patients should contact the provider’s office if signs of infection develop, including increasing redness, warmth, purulent discharge, or fever. Routine follow-up is typically not required unless the patient has concerns, and the patient is discharged the same day without a recovery room requirement. Save My Fat’s overview of how banking works includes the full patient-facing workflow for reference.
Two Questions Every Physician Asks
How Different Is This from Liposuction I Already Perform?
For a physician already performing aesthetic liposuction, even at low volume, the harvest technique is immediately familiar. The cannula, the tumescent technique, and the entry port management are identical. The differences are three. The target volume is 20 cc rather than hundreds of cc. Manual low-pressure aspiration is preferred over high-pressure mechanical aspiration to preserve cell viability. The chain-of-custody specimen packaging protocol is added to the back end of the procedure. Any physician already comfortable with a cannula and local anesthesia can perform this procedure after completing Save My Fat’s training. Save My Fat’s overview of the complete banking process illustrates where the harvest fits in the broader workflow.
For a physician who does not currently perform liposuction, the harvest is still a learnable minor procedure. It is smaller in scope than most aesthetic liposuction cases, and Save My Fat’s training is designed to onboard providers at both experience levels.
What Happens If a Patient Has a Complication?
The clinical risk profile of a 20 cc tumescent mini-lipoaspiration under local anesthesia is low. Documented complications in the published small-volume lipoaspiration literature and related clinical safety reviews are primarily minor infection at the entry port (manageable with standard wound care and antibiotics), bruising and swelling (typically self-resolving), lidocaine toxicity (preventable with appropriate dosing discipline calculated per patient weight before infiltration begins), and contour irregularity (extremely unlikely at 20 cc volume).
From a regulatory standpoint, adverse events associated with the harvest procedure should be documented and reported per Save My Fat’s protocol and the provider’s existing adverse event reporting obligations. Because banking is a Section 361 HCT/P service under 21 CFR Part 1271, the provider’s documentation obligations align with standard tissue collection practices rather than drug or biologic adverse event reporting requirements, which are structured differently.
Frequently Asked Questions
Can I perform the harvest in a standard exam or procedure room?
Yes. The harvest does not require a hospital facility, surgical suite, or general anesthesia. A standard minor procedure room with appropriate instrument trays, local anesthetic, and waste management is sufficient. No capital equipment purchase is required beyond what most minor surgical practices already have. The Save My Fat provider program includes the equipment and supply checklist partner providers receive during onboarding.
How long does the full procedure visit take, including consent and prep?
Plan for a sixty-to-seventy-five-minute appointment block. Fifteen to twenty minutes for final consent review and preparation. Fifteen minutes for anesthetic infiltration and wait time. Fifteen to twenty minutes for the collection itself. Ten minutes for wound care and specimen packaging. Ten minutes for discharge instructions. The collection component is approximately fifteen to twenty minutes, which is the figure that determines how the procedure fits into the practice’s appointment schedule.
Does the patient need to be a certain age or weight?
There is no strict age cutoff, though cells banked earlier in life are preserved at higher biological quality than cells banked later. The patient needs sufficient subcutaneous fat at the donor site to yield approximately 20 cc of tissue. Most adult patients outside of very low body fat categories will meet this threshold. Save My Fat’s patient-facing introduction to adipose-derived stem cells covers the biological rationale for earlier banking.
What if I collect less than 20 cc?
Discuss with L2 Bio’s clinical team. Cell yield from adipose tissue is volume-dependent, and collecting the full 20 cc target optimizes the vial count the patient receives. Sub-optimal collection volume may reduce the total vials produced. Save My Fat’s protocol documentation covers minimum acceptable volumes and the discussion framework for patients whose collection volume fell below the target.
Do I need to inform my malpractice carrier about adding this procedure?
Standard practice is to notify your malpractice carrier when adding any new procedure type to your scope of practice. Banking is a minor lipoaspiration procedure for tissue collection, not an experimental therapy or treatment, which tends to simplify the notification conversation. Consult your carrier’s specific notification requirements and any state licensing obligations that may apply in your jurisdiction.
Key Takeaways
The harvest is a 30-minute in-office procedure. Tumescent local anesthesia, 20 cc subcutaneous fat collection via small-bore cannula from the abdomen or flank, chain-of-custody specimen packaging, and same-day shipping to L2 Bio. No hospital facility, no general anesthesia, and no on-site laboratory required.
For physicians already performing liposuction, the technique is immediately familiar. The three differences from standard aesthetic liposuction are the smaller volume target, the preference for manual low-pressure aspiration to preserve cell viability, and the addition of the chain-of-custody specimen handling protocol on the back end of the procedure. For physicians not currently performing liposuction, the harvest is still a learnable minor procedure and Save My Fat’s training is designed for both experience levels.
The seven-step sequence runs from donor site selection and marking, through tumescent anesthesia, entry port placement, low-pressure tissue collection, entry port closure, specimen packaging under chain-of-custody protocol, and same-day shipping. Each step has clinical specificity attached, and none of the steps are ambiguous enough to require improvisation at the bedside.
Manual low-pressure aspiration is preferred over high-speed mechanical aspiration to preserve cell viability in the collected specimen. This is the single technique modification most aesthetic liposuction providers need to internalize when adapting their workflow to banking collections.
The clinical risk profile of a 20 cc tumescent mini-lipoaspiration under local anesthesia is low. Standard wound care, lidocaine dosing discipline calculated before infiltration, and adverse event documentation covering the same categories as any minor procedure, cover the relevant risks. Regulatory documentation aligns with Section 361 HCT/P tissue collection standards.
Save My Fat provides full procedural training, chain-of-custody documentation, and specimen shipping kits to all partner providers before the first patient is scheduled. Partner physicians are not building this from scratch.
Ready to See the Procedure in Action?
Before contacting Save My Fat: adipose tissue banking is a preservation service for potential future use in FDA-regulated pathways, not a treatment or a guarantee of access to any specific clinical trial, therapy, or product. No adipose-derived product is FDA-approved for general disease treatment, and banking cannot be represented to patients as one. The procedural information in this post is educational only and does not constitute procedural training. Formal training is provided through Save My Fat’s onboarding before any partner provider performs a banking harvest. Physicians considering partnership should independently verify applicable state licensing and informed-consent requirements, particularly in Florida, Utah, and Nevada, which have stem cell-specific statutes.
The procedure is straightforward. The training covers everything before you see your first banking patient, including the harvest technique, the specimen handling protocol, the chain-of-custody documentation, and the patient consultation framework.
Save My Fat partner providers receive full procedural training on the harvest technique and specimen handling, chain-of-custody documentation and shipping kits, patient consultation and informed consent frameworks, and ongoing clinical and compliance support from a team with decades of regenerative medicine experience.
To review the full program structure, visit the provider program overview. To begin onboarding as a partner, visit the partner sign-up page.
Save My Fat provides adipose tissue banking services in partnership with L2 Bio for laboratory operations. Save My Fat does not provide medical treatments, clinical trial enrollment, or Expanded Access services.
This article is for educational purposes only and does not constitute medical or legal advice. Legal and medical review including neurology and neurosurgery input is required before publication. Please consult your neurologist or neurosurgeon before making any decisions about neurologic treatment or research participation.